How to make Sri Lanka’s anagi II stove
Practical Action
Finishing Procedure
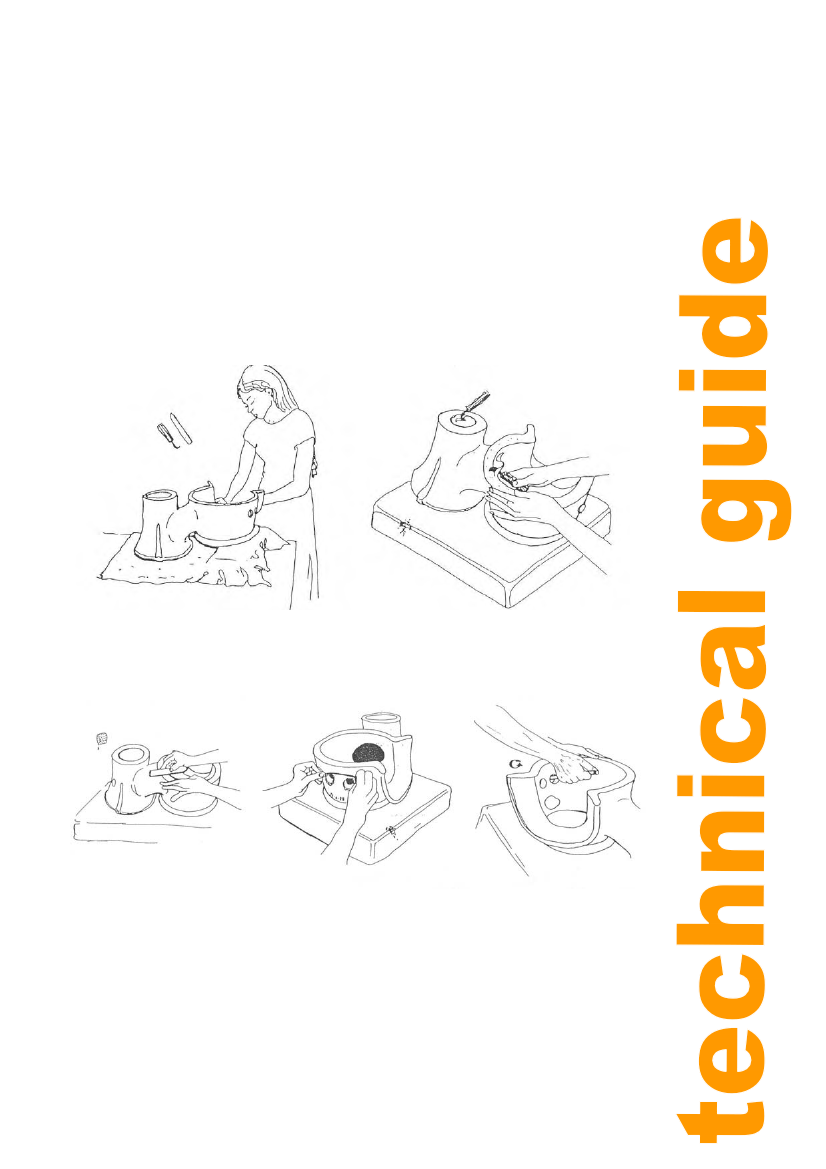
After 3 days of stiffening indoors on the pallet, the stove can be removed from the pallet
without distortion. At this time the final finishing is done to the stove. Sharp edges are
carved away and those areas are dampened with a sponge. They are then rubbed with a
wooden stick. The stick is then used to rub joints, especially the tunnel, baffle, and door
joints. It is necessary to turn the stove upside down for most of this procedure. Either use a
3” thick stiff foam rubber pad, or support the shorter firebox with a cloth covered brick. The
whole procedure should require only 10 minutes.
In some factories, the assemblers "finish" the stoves they assembled. In other factories, the
finishing work is all done by one person.
Note: Configuration of brick with cloth covering as support for the stove while it is upside
down. All other illustrations show the foam pad.
1. Here she is carving away any sharp edges
around the door. She then rubs the areas
with a stick.
2. The sharp edges on the bottom of the fire
box and the second pothole are carved away.
3. They are dampened with a
sponge, and then rubbed with A
wooden stick.
4. The sharp edges on the
airholes are carved off with
the knife.
5. They are then dampened and
rubbed with a stick.
27